Create your very own green zen space, hanging plant utopia or exotic bathroom spa with our lifelike artificial plants. Have fun creating instant updates and placing greenery wherever you want it without any of the hassles of caring for real plants.
Whether you want to create a jungle outdoors or indoors, our wide range of artificial trees has been crafted to perfectly mimic nature – even up-close.
Screening doesn't have to be dull. Shop our range of artificial plant screening options to beautify your fencing, add privacy to intimate areas of your garden or mask unsightly spots.
Finishing touches like pots and planters will make a huge difference to your artificial plants, trees, and flowers. A pot will help the plant blend (or stand out) into it's new home and it'll improve stability too.
What could be better than unpacking your stunning new artificial plant, positioning it in pride of place and it looking absolutely perfect? Knowing you got yourself a bargain! Check out our special offers including our famous weekly wonders.
A garden full of beautiful faux plants means there's no maintenance to keep your garden looking amazing. But, like any garden, proper planning is important!
Just a little hard work at first will result in an exceptionally low maintenance garden to enjoy. No pruning or feeding needed, plus it'll look great no matter how busy you are.
In this guide to planning and creating the perfect artificial garden, we'll share our expert advice on planning, designing and creating your dream garden. Read on...
Gather inspiration & choose a style
Having a good idea of the look you want to achieve will be instrumental in guiding you through the process of creating your perfect artificial garden.
There are various tools and websites available that you can trawl through for ideas to influence your new garden, whether you're choosing a colour scheme or looking for layout ideas.
Pinterest is one of the best places gather inspo for your new garden, offering a plethora of different ideas and styles to match your own aesthetic.
The best part is that you can create your own personal board and pin ideas to it for later!
Instagram also has a hub of inspiration to explore with #gardendesignideas boasting over 120,000 posts from other garden designers.
Current garden design trends
The younger generation is looking back to the gardens of their grandparents, preferring durability and affordability, causing them to reach for natural materials like wood, stone and clay over plastic pots and rusting furniture.
Wellness spaces
During the pandemic, experts recommended gardening as a way to benefit people's mental health, which resulted in an increase in gardening popularity.
This trend has continued with many enjoying the wellness benefits that both real and faux plants bring.
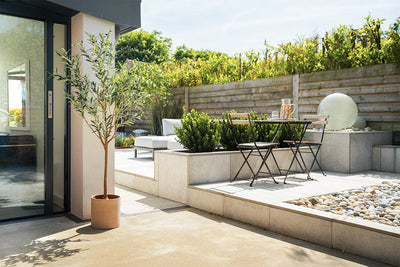
Find a space where you can add a comfy chair and a small water feature to help ease your mind after a long day.
If you have the room, you could create a separate, more secluded zone in your garden where you can escape for some me-time.
Outdoor living
Our gardens are no longer separate from our homes. Nowadays, one of the biggest trends is to blur the line between indoor and outdoor living, turning our gardens into an extension of our homes and making them excellent hosting spaces!
Outdoor kitchens and bars are particularly popular for spending summer evenings with friends and family, alongside outdoor seating areas or even your own garden cinema if space allows!
In smaller gardens, this can be adapted by adding a small table and chairs with a couple of cushions and blankets, almost like a garden living room.
Vertical gardens
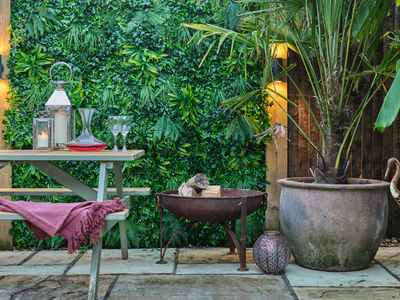
Before:
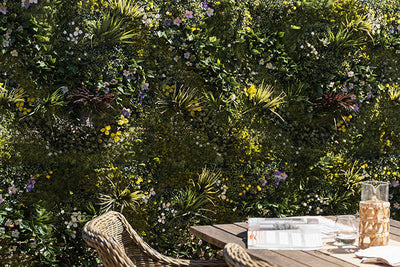
After:
Transforming crumbling walls and old fences is one of the biggest ways that you can refresh your garden and add some botanical beauty!
Adding artificial green wall to your garden isn't necessarily a new trend, but it's one that continues to rise in popularity.
This trend pairs nicely with outdoor living spaces, acting as a beautiful backdrop for outdoor bars and seating areas!
Before you decide fully on the things that you'd like your garden to include, consider how you'll use your space and who will be using it the most.
Will there be children, grandchildren or pets running about? Do you plan on hosting friends and family? Or is it simply a space for you to enjoy?
These things might help you decide how much open space you'll need, the materials you use and other aspects of your garden.
Make a wishlist
Once you're set on a style and know the kind of vibe you're going for, put together a wishlist of things you'd like to include.
This list may change when it comes to sketching out your plan, but it will be useful when you create a budget and decide exactly what's on your to-do list.
How to plan your artificial plant garden
Fully inspired and ready to go? Now you can start planning exactly how your garden will look!
Map out your garden
If you can reach the boundaries of your garden, simply measure the length of each side. If however, you already have established plants that make it tricky to measure your garden, you might find it useful to look at a satellite photo online.
Make sure to consider where in your garden receives the most sunlight vs shade so you can find the best spot for hosting.
Try to draw your garden to scale, that way you'll know approximately how much material you'll need and what will fit your space.
There are several online design tools available which can help you create a sketch of your garden and are especially useful if you're not particularly creative.
Your map should highlight any problems you may have and allow you to see how much space you have for furniture, plants, etc.
Set a realistic budget
If you sketched your garden to scale, you should have a rough idea of how much your garden will cost. That said, projects like this usually end up costing more than you expect due to unforeseen expenses, so factor in some extra money to account for this.
If you've roughly mapped out your space, you can still set a fairly realistic budget for your garden by planning which plants you'd like to add, any particular features you want to include and any furniture or decor that you need to buy.
Creating an artificial plant garden
Once you know the steps you need to take to achieve your dream faux plant garden, you can get to work! Below are some step-by-step guides to help you build your new outdoor space.
How to lay a patio
Laying a patio may seem like a daunting project, but its very simple once you know what you're doing. The hardest part is that you'll need some equipment to complete the job. This includes a wacker plate or hand tamper, cement mixer and an angle grinder.
Depending on the state of your existing garden, you may need to dig out some turf to make space for your new patio. You can either do this by hand, or you may wish to hire a mini digger to make this easier. Make sure to factor in the cost of hiring equipment like a wacker plate, cement mixer, disc cutter and digger before you begin laying your patio.
1. Choose your paving slabs
First, you can start with the fun part - choosing your paving slabs!
There are typically three types of paving slabs to choose from:
Porcelain slabs
Porcelain slabs are a very low maintenance alternative which solve the majority of issues that you can have with natural slabs. They're made by firing clay at high temperatures and can be shaped to replicate the texture of natural stone.
Their porosity is close to 0% which means that porcelain slabs won't absorb stains and dirt like natural stones might. They're also incredibly strong and often scratch resistant.
The downside to using porcelain slabs is that they're harder to lay, plus their durability makes them more expensive than other slabs.
Although they're exceptionally tough, they're also tricky to cut and may need a specialise blade. What's more, their 0% porosity, means that they struggle to stick to mortar, and therefore need primer added to the bottom of the slab to allow it to stick to the bed.
Natural (sandstone, limestone, granite and slate) slabs
Natural slabs are often seen as the superior choice for laying a patio. This is because they tend to age better than man-made alternatives and are often more frost resistant and are easier to clean.
Sandstone slabs are usually very tough and easy to work with. They're relatively easy to clean, and if looked after, they'll last a lifetime while adding value to your home. They can however fade if not taken care of and they can be a little rough on the surface.
Limestone is similar to sandstone, but where sandstone has a more natural, textured finish, sandstone is often smoother and has less variation in colour. It's very easy to work with, but it's more susceptible to fading in direct sunlight.
Granite is incredibly tough and comes in a range of colours and finishes to suit your style. It's also the least porous which makes it easier to clean. The downside to choosing granite is that it's harder to come by so it comes at a premium, and being so heavy makes it rather labour intensive to lay.
Slate is a more delicate stone which features beautiful colours that have been naturally formed underground and are virtually impossible to re-create by hand. It also doesn't fade as easily as some other options.
The downside to slate is that it's made up of layers which can flake away, allowing pits for water to pool and if you choose to use slate, make sure that you choose calibrated slate. This has been through a machining process to ensure each slab is an even thickness.
Concrete slabs
Concrete is also very strong and will last many years with little damage. It's also slip resistant, making it a great option around children. The main con of choosing concrete is that it's highly porous which makes it susceptible to stains if it isn't resealed regularly.
2. Measure your area
Work out how many paving slabs you'll need by calculating the total area of patio. To do this measure the length and width of each side in metres and multiply these numbers together to get the area in square metres. Where there are irregular corners and shapes, break these up into smaller squares or triangles, measure each shape and add the areas together.
It's best to account for any breakages and mishaps by ordering around 10% extra.
3. Prep the area
Use string and wooden pegs to mark out the perimeter of the area you'll be paving. Then, remove any grass or obstacles in the way.
Dig at least 18cm deep (depends on the thickness of your slabs) and slightly wider than the width of your paving slabs, then use a spirit level to ensure any water would run away from your home.
Use your rake to even the ground and compact the area with a wacker plate or hand tamper.
4. Add your sub-base
Add a layer of MOT type 1 around 15cm deep and rake it into place before going over it with a wacker plate or hand tamper until it's around 10cm deep.
Make sure to double check the levels of your base layer with a spirit layer for any uneven areas and add more sub-base to even it out if necessary.
5. Prepare to lay
Before you start laying your slabs, you'll want to get your mortar ready. It's best to make enough for just a few slabs at a time to prevent it from setting too soon.
A basic guide is to use a 4:1 ratio for your mortar. Use four parts sharp sand to one part cement and gradually mix in water until you can shape a small ball in your hand.
Use your string and wooden pegs to mark where you'll lay your slabs. Simply put your string in a line across the start and finish of your first row and keep moving this for each row of slabs that you place.
6. How to lay paving slabs
Test your method by putting a few slabs in place without any mortar. This way you can get a feel for how much space you'd like to leave in between each slab for pointing. The most common spacing is between 5-10mm.
When you're happy, you can start laying your patio! Remember, if you're using porcelain slabs, that you'll need to add a primer on the bottom of your slab to help it adhere to the mortar.
Use your trowel to add your mortar where you'll put your first slab. It's best practice to trowel your mortar into a peak before putting your slab down so that it spreads evenly as you push and tap your slab into place.
Pop your first slab on top of the mortar and tap it into place with a rubber mallet, pushing it down to make sure there's no gaps underneath.
Any mortar that squeezes out of the sizes can be used for the next slab, but make sure to clean off any remaining mortar off the top of your slabs with a stiff bristle brush as it'll be much harder to remove once set.
As to you finish your first row, use a spirit level to ensure it's even and repeat until you're finished, moving your string down each row as a guide.
If you need to make any cuts, do so using a diamond-tipped saw or disc cutter, wearing a mask and protective glasses while doing so. If you're cutting porcelain slabs, it's best to use a specific porcelain blade and wet cut as it tends to get very hot and can break.
7. Wait for your patio to set
Once all your slabs are down you need to let your patio set for 24-48 hours. If it's likely to rain, cover your patio with a tarp to protect it and make sure nobody walks on the slabs during this time.
8. Grout the joints
The last step is to fill in each gap between your slabs with a grout mix.
There's a few different methods that you can use to do this. the most common include:
Traditional sand and cement mix - must be trowelled into joints
Slurry grout - can be poured across your paving slabs and pushed into joints using a squeegee
Brush-in or sweep-in ground - Easy, pre-mixed dry grout which can be brushed into joints
Lots of professionals prefer the traditional sand and cement mix for its durability, but pre-made mixes are perfectly good to use and mean that you don't have to get on your hands and knees.
With the traditional mix, combine four parts sharp sand with one part cement and gradually add water until it balls up nicely in your hand.
If you're using a pre-made mixture, you'll likely need to wet your patio first to stop it from staining your paving slabs. You may wish to repeat throughout the process to make sure your patio doesn't dry out as you're grouting.
Before you start, remove any loose mortar or dirt in between your slabs. Then, either trowel in your traditional mix, or simply pour your pre-made mix and push into the joints, using a squeegee for wet mixtures or a broom for dry grout.
After around 15 minutes, you should be able to give your slabs a light wash to remove any loose grout mix. After 30 minutes, or when your grout it set, give your patio a good clean, being careful if using a pressure-washer. Any grout sitting on your slabs can be loosened with a stiff brush before washing away.
9. Seal your paving slabs - optional
If you want to protect your paving slabs staining or fading in the sun, you can apply a sealant. This isn't needed for porcelain slabs as they have such a low porosity.
Adding a pathway
Pathways are an often overlooked aspect of our gardens, but they're ideal for connecting the different zones of your garden and can be just as beautiful as they are practical.
There's various different styles of path that you can adopt. The easiest options are simple stepping stones or gravel paths. Paving slabs on the other hand will be more hassle to install, needing cement to secure them into place.
Gravel paths are one of the easiest paths to lay. The most difficult part involves digging and hauling the gravel and sub-base.
1. Plan, dig & level
Start by roughly marking out your path using some wooden stakes and string, then dig around 4 inches deep. Keep checking the depth as you dig and smooth over your soil with a rake and compact using a hand tamper.
2. Install edging
There are a few options to border your path and stop the gravel from moving around.
Options include:
Treated timber
Stone
Plastic edging
Bricks
Installation will depend on the type of edging you choose.
For timber edging, lay it flat against the side of your path and hammer in wooden pegs in approximately 1m intervals using exterior screws.
If you're using stones of bricks, lay them tightly together and fill any gaps with soil or gravel.
Plastic edging can simply be pushed into your soil so that it's level with the height of your path.
3. Add sub-base & compact
Add around 2 inches of sub-base on top of the flattened soil and rake it until your path is flat.
Dampen your sub-base using a watering can first. This will help to keep dust down and aid in compacting your sub-base. Then take a hand tamper and compact the stone until smooth.
Check with a spirit level to make sure that your path is even, then adjust if necessary.
4. Lay landscape fabric
Roll out a layer of landscape fabric over your stone, making sure that the shiny side is facing up. You can overlap your fabric to fit any curves along your path.
This will help to keep weeds from growing through your path and keep your gravel separate from the compacted stone below.
5. Add gravel
Once your weed membrane is in place, you can add your gravel.
Pea gravel is usually the best option as its comfortable to walk on and is particularly good for high-traffic pathways. Plus it has an elegant, timeless look that tends to work with most garden styles.
Distribute your gravel evenly across your path and rake into place until it's level.
Laying stepping stones
Stepping stones are even less work to install than a gravel path.
All you need to do is plan out where you'd like your steps to be, then using a Stanley knife, lay your stone over your turf and cut around it, removing the turf underneath and sitting your stepping stone into the newly made hole.
How to install decking
If you've decided to install decking in your garden, we've got an easy step-by-step guide below.
You can either choose to use wooden decking boards or composite decking. Using pre-treated wooden boards will give your decking a warm, natural feel, but they'll need yearly treatment and regular cleaning to maintain them.
Composite boards, on the other hand, are a blend of wood and plastic, needing less maintenance than natural wood boards and typically standing up better to the weather.
1. Measure and calculate materials
Before you begin installing your deck, you'll want to calculate how much it's going to cost you and how many boards you'll need to bring your vision to life.
Mark out your area and measure the longest and shortest edges. Multiply these numbers together to calculate the area of your space.
If you're planning on including any curved edges measure these as if they were square. It's best to have more materials than you need than have to re-order more halfway through installing your decking.
Make sure to also check for any underground pipes and cables before you begin digging!
2. Prepare your space
If you need to remove turf, cut the edges with an edger, then remove the turf and around 5cm of soil. Compact the area with a hand tamper and check it's level.
At this point, you can either install your decking straight off the ground, or add some concrete pads to provide a more sturdy base.
If you're building straight from the ground, lay some landscape fabric on top of your newly compacted soil to prevent any weeds and grass from growing through your decking. Remember - shiny side up!
Add a layer of gravel on top of your landscaping fabric to bring it level with the rest of your garden and create a sturdy base for your decking.
An optional step is to lay some concrete slabs on the corners and centre point of your area to support your decking. Just double check to make sure that they're all level.
3. Add a wall plate (optional)
If you're deck is freestanding, you can skip straight to step four. If you're deck is going to be attached to your home, you'll need to attach a wall plate, which is essentially a joist used to connect your deck frame to your house.
Begin by marking a vertical line where the end of your joist will be placed. Make sure that the top of the wall plate is at least the same depth as your deck board plus another 10mm below the bottom of any doors to allow for expansion.
Cut your first joist to your required length, measure 100mm in from one end and mark a vertical line down the joist.
Then drill a pilot hole along the line you've just drawn, 50mm from the top and 50mm from the bottom edge of your joist. Repeat this at approximately 600mm intervals.
Once you've reached the other end of your wall plate, measure and mark another 100mm section.
Drill your pilot holes big enough for your screws and treat all the cut ends and holes with two coats of preservative to protect the timber.
Double check that your deck board still fits beneath the sill of any doors, then drill guide holes into your wall using a 7mm masonry drill bit, while having someone else hold the wood in place for you.
Then remove your wall plate and drill complete holes into your wall using the guide holes to help. Insert wall plugs into the holes and put your wall plate back into position, in line with the marks you initially made. Insert screws into the holes and hang washers on the end.
The washers should create a 10mm gap between the wall and your wall plate, to stop any water getting trapped between your home and your decking.
Finally, use a drill to secure your screws into place.
4. Build a sub-frame for your decking
Begin constructing the outer joist frame to form the perimeter of your decking. Depending on the size of your planned decking, you may need to join several joists together to create your sub-frame.
If you're building a raised deck, use decking posts to elevate your deck and secure them with screws.
Once you've built your perimeter, you'll need to add some internal joists to support your decking boards. Measure along your external frame and mark 400mm intervals. When you get to the end, you can leave a small gap between your final joist and the external joist, instead of leaving a gap over 400mm.
Make sure to position your joists in the opposite direction to your decking boards to properly support your decking.
To secure your internal joists, line them up on the inside with your 400mm marks. Extend your marks to the external frame and make two new marks on the external face along your line - 40mm from the top and 40mm from the bottom.
Drill pilot holes at these marks, countersink them and use 100mm timber drive screws to secure your internal joists. You can secure your joists further by using joist hangers.
Lastly, add noggins to every joist to provide additional support.
5. Lay your decking boards
Once your sub-frame is built you can begin laying your decking boards, starting from a corner and leaving a small 5-8mm gap between each board to allow for expansion.
If you're planning to add a fascia board to your decking, your first board should slightly overhang the edge of your decking.
Drill a pilot hole where your board meets your inner joists to prevent the wood from splitting and countersink the holes for a smooth finish, repeat along each board.
Secure your boards into place using 64mm decking screws.
6. Add a fascia board (optional)
To add your fascia board, use packers or offcuts to keep your fascia level. Using the marked lines on your external joists, drill guide holes into your fascia board along your decking and secure using 64mm decking screws.
Seating areas
Having a space in your artificial garden to sit and enjoy the fruits of your labour is a high priority for many of us. In more recent years, outdoor sitting spaces have been designed to act as extensions of our homes, making excellent spots to host and relax during the summer months.
You might choose to add a table and chairs to your new patio or decking, or you could create something totally new in a corner of your garden, or even under a pergola.
1. Find the right spot
To begin creating your outdoor seating area, make sure you've found the perfect spot for it. You might think that a sunny spot would be best, but in the height of summer, you'll likely prefer a more shady spot which also shelters you from the wind.
You'll also want to consider how overlooked your new sitting area will be. If finding a secluded spot isn't possible, consider adding some tall trees, or some screening planters for extra privacy.
2. Create a base for your seating area
Once you've found the right spot, you'll need some sort of base to support any tables and chairs or sofas.
This might be an existing patio or decking, or you may need to start from scratch.
If your chosen space is currently turfed over, the easiest and quickest way to have your seating area ready, is to remove the turf and lay some gravel down instead.
Simply, cut around your area with an edging tool and use a spade or shovel to remove your turf.
Then, add any edging you'd like to include. You can use purpose-built edging for a nice neat edge, or try stones or bricks to outline your space.
Add a layer of sub-base and compact using a hand tamper.
Finally, lay down some landscape fabric (shiny side up) to keep weeds at bay, and cover with your chosen gravel, ready to add your furniture on top.
Alternatively, you can lay down a concrete bed for a sturdier, longer lasting base.
3. Consider cover
If your space is rather out in the open, you might wish to add some cover to keep you sheltered from wind, rain and to generally make sure space feel more cosy!
Pergolas and gazebos are popular, pergolas in particular as they work brilliantly with climbing plants to create a beautiful plant-filled paradise.
An easier way would be to use a parasol or umbrella to keep the rain out. The choice is really down to aesthetics and the kind of style that you want to achieve.
4. Add furniture
Here you can bring your vision to life with your chosen furniture and decor.
You might only need a single chair and small side table, or you might want to create the ultimate hosting space with a large corner sofa or dining space.
However little or large your seating area is, there are plenty of ways to build a stunning space that you can relax in.
To help your new space blend into your home and garden, try tying your decor into an existing colour scheme. This might be a well planned out pattern throughout your home, or it could simply tie into the colour of your fence, windows or paving.
Lastly, consider adding storage space for cushions and blankets, including lift-up benches to keep your space tidy and protected from the weather.
5. Add plants
Instead of interrupting your space, the best seating areas should feel as though they're a part of your garden.
The easiest way to do that is to add some greenery, be it large palm trees, flowers or some trailing faux ivy.
Not only will plants add some botanical beauty to your space, but you can also use them to appeal to your other senses.
Fragrant plants like lavender and honeysuckle will make your space all the more relaxing, while bamboo and grass plants will provide a gentle rustling sound in the breeze, helping to drown out the sound of noisy traffic.
And if tending to plants isn't your forte, you can swap them for low maintenance faux flowers or plants for some easy peasy colour!
The benefit of going faux isn't just about maintenance, it also means that you won't have to wait for your plants to grow to their full height, which is especially useful if you need some tall plants to shelter your space.
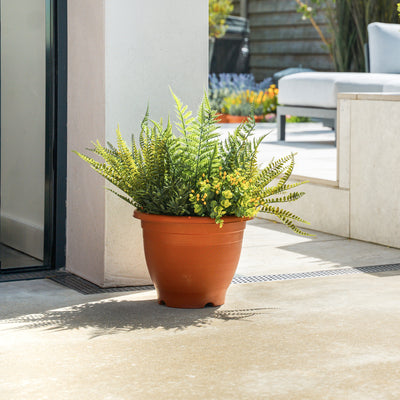
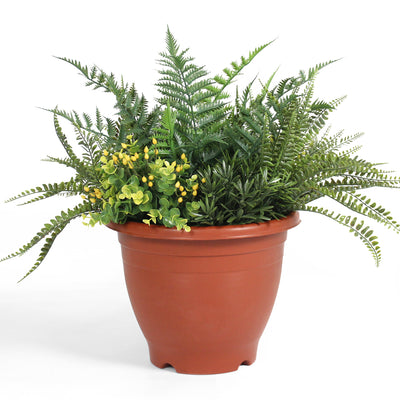
Our exotic artificial areca palm is popular for adding some tropical flair to your artificial garden, while our range of faux patio flower tubs add uplifting colour without the need for regular watering.
Of course, you can choose to have a blend of real and faux plants. For example, use natural grasses and shrubs to fill large gaps, and pair with faux versions of more naturally high maintenance plants like artificial topiary, bamboo and outdoor faux flowers.
This combination means you can enjoy as little or as much gardening as you like!
How to light your garden
If you're hoping to enjoy your garden in the evening, you'll need some form of lighting to bring your space life after dark.
Before you add any lights, check that they're designed for outdoor use and are waterproof!
Light up your pathways
Even in a smaller garden, adding a few lights along your path helps to connect your home to your garden, along with any different sections that you've created in your outdoor space.
Not only do they look warm and inviting, but they also have a practical role to play in preventing trips and falls.
On a basic level, these could be some solar-powered lights staked into the ground, or some recess ground lights along your path.
Aim to sit your lights at roughly 6ft intervals, or sit them further apart if you'd prefer less light.
Illuminate your decking
If you have any decking, we'd recommend installing some lights along the edges of your deck for safety.
These could be some simple lamps or lanterns, or for a more modern approach, you could install some recessed lights which will look more sleek and prevent anyone from tripping over surface-mounted lights.
If you have any steps, it's a good idea to have some lights along the way to stop anyone from tripping up or down them.
Add some sleek step lights to the step risers or, for a more modern approach, you could install some led strip lights under the tread of each step.
If you'd rather not go through the hassle of installing lights into your steps, you could sit some potted plants on either side of your steps and poke some post lights into the soil.
Add garden string lights
String lights are brilliant at adding ambience, but they can also be used to gently light up small spaces, adding a cosy feeling to your garden.
The great thing about string lights is that you can use them pretty much anywhere to cast a soft glow.
Around seating, at a garden bar or BBQ area, try draping some string lights along a wall or fence to add some warmth to your space.
In an outdoor dining space, you can trail your lights overhead, by hanging them between your home and a wall, fence or garage.
You could also add some magic to your garden by trailing them around tree branches.
Cast a soft glow with wall lights
Wall lights are perfect for lighting up doorways and can help to soften up any external walls that face your garden.
Whilst wall lights provide functional lighting for evenings with your friends or a quiet night in your garden, you can also strategically place them around your garden to highlight certain features, whether that's a water feature, a hot tub or even your favourite plants.
Using artificial plants in your garden
Using artificial plants vs real plants in your garden makes your life incredibly easy, especially if you like to travel or simply don't have the time to tend to them.
With a wide variety to choose from, there's sure to be something to suit your space - whether it's quick and easy colour from a faux hanging basket or a touch of elegance from some classic topiary trees.
Which are the best artificial plants to choose?
The best artificial garden plants are specifically designed to be used outside. These plants are different from indoor faux plants, as we use a premium grade chemical stabiliser, absorber and/or blocker during the manufacturing stage which prevents these plants from fading and discolouring in the sunlight.
By sticking to faux plants that are specifically marked for outdoor use, you won't have to worry about them under the suns harsh UV rays.
Although our outdoor plants are treated to prevent fading under the sun, they will still need some protection during extreme weather conditions like storms.
To protect your faux plants from extreme weather:
If possible, temporarily move your plants to a more sheltered spot out of high winds.
If moving isn't feasible, wrap the leaves of your plants in bubble wrap or something similar to prevent any damage to the leaves and stems.
It’s handy advice to think seasonally with your planting, particularly for easily moved items like hanging baskets and pots.
For instance, keeping your artificial geraniums out all winter might raise suspicion. Instead, try swapping them for some winter faux flowers, like pansies, to keep up the guise and help your garden look realistic.
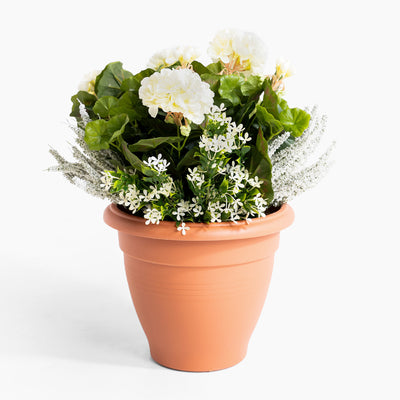
This is where potted plants are brilliant as they offer instant colour. You can go down either the flower or topiary route, or go all out and do both!
A pair of patio tubs will add vibrant colour to your entrance and ensure it's always blooming, whereas flanking your front door with a pair of artificial boxwood spirals or other topiary trees will add a touch of elegance and create a welcoming feeling for guests.
Bushes like faux hydrangeas are brilliant because you can plant them directly into the soil, so they truly become part of your garden.
You also don’t need to leave a large gap around your plants as no growth room is required! This is great as close planting will make your garden look well-established!
Watch our video below to learn how to plant artificial flowers.
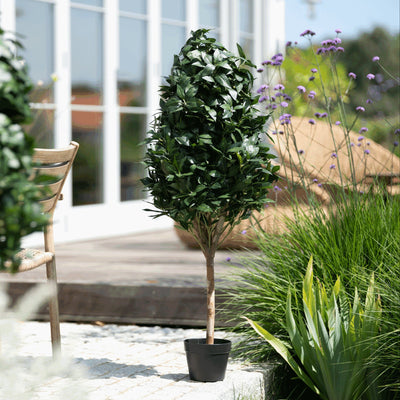
Adding faux trees to your garden
Adding a few faux trees to your garden is a brilliant way to add height and structure to your space. Just remember to choose trees are that designed for outdoor use with UV protection.
If you're feeling tropical, our exotic areca palm is a popular choice for dotting around borders, sitting by hot tubs and around seating areas.
Alternatively, our oriental bamboo also does an excellent job of this, with natural bamboo canes.
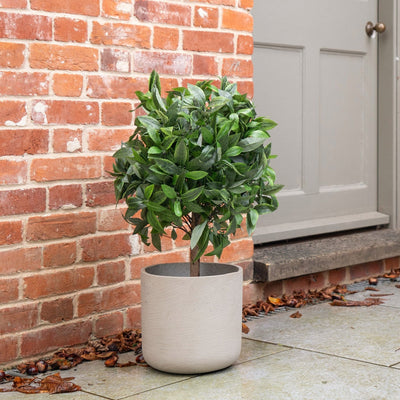
If you'd prefer something with a more sophisticated, classic style - topiary is the way to go! A couple of bay laurel trees by your back door or some fake spiral trees around the borders of your garden will add grandeur to your home. Plus, you'll never have to trim them into shape!
Most of our outdoor artificial trees arrive with a standard black pot but we always recommend repotting them into something more attractive or heavier to give it added stability.
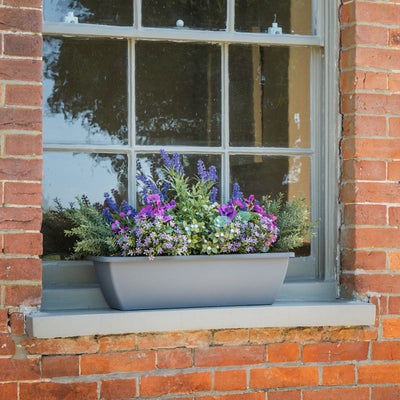
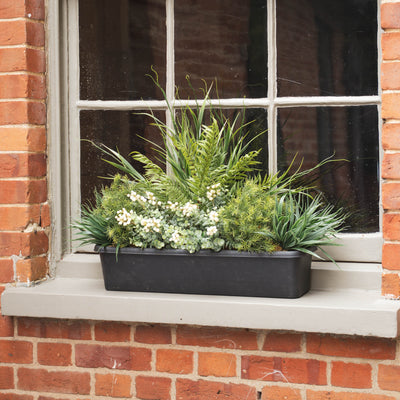
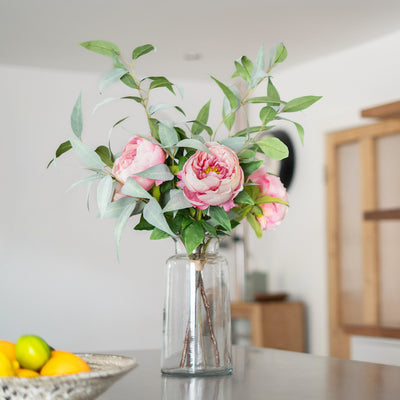
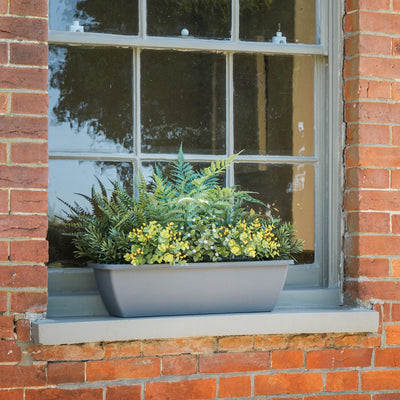
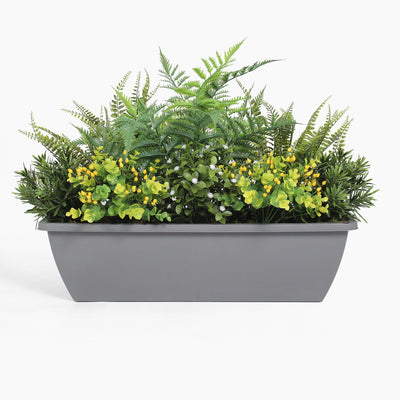
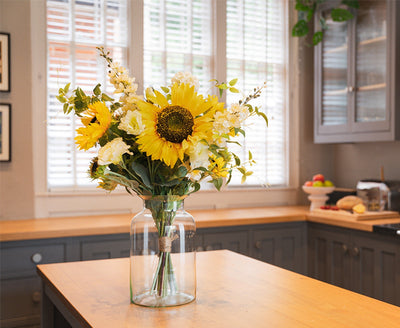
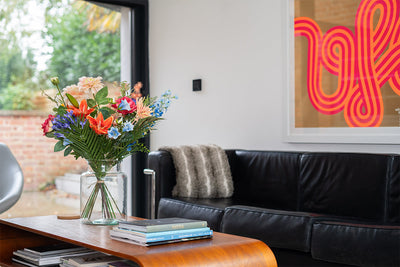
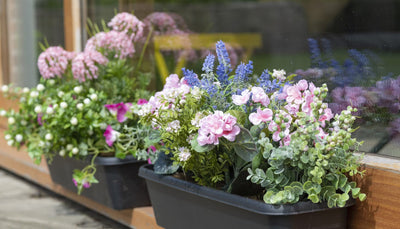
Add extra colour with arrangements
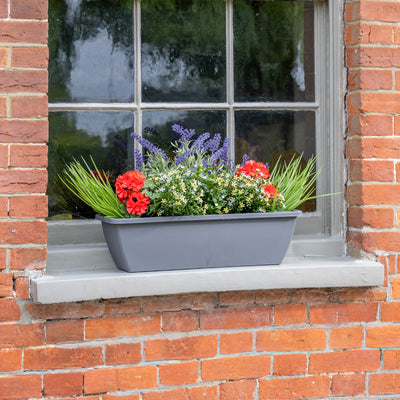
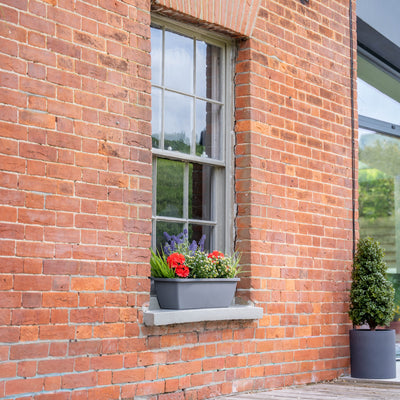
Sometimes a house doesn’t quite look right without a few hanging baskets or a window box. For an easy life, you can buy these ready planted and simply fix them in place.
Geraniums are very popular at the moment – they somehow manage to look contemporary on modern properties, yet more country cottage on older buildings.
Keeping your garden private from overlooking neighbours and passersby doesn't require years of waiting for your trees to grow. Now there are plenty of options to help screen your garden from any prying eyes!
Artificial hedging offers the highest level of privacy, with a variety of foliage types to choose from and a range of sizes on offer.
Not only is it completely maintenance-free, but it offers an instant, no hassle solution and is easy to install.
The alternative is to choose plants that will block out your neighbours view. You can try natural plants like buddleias, but they'll need chopping back each year to keep them in check.
If you want something that's instant and won't take over your garden, faux bamboo trees are a brilliant way at adding privacy without hassle.
You can buy them separately or save some money when you opt for one of our screening bundles which includes a handy trough planter on wheels. See our full range of artificial plants for privacy.