Create your very own green zen space, hanging plant utopia or exotic bathroom spa with our lifelike artificial plants. Have fun creating instant updates and placing greenery wherever you want it without any of the hassles of caring for real plants.
Whether you want to create a jungle outdoors or indoors, our wide range of artificial trees has been crafted to perfectly mimic nature – even up-close.
Screening doesn't have to be dull. Shop our range of artificial plant screening options to beautify your fencing, add privacy to intimate areas of your garden or mask unsightly spots.
Finishing touches like pots and planters will make a huge difference to your artificial plants, trees, and flowers. A pot will help the plant blend (or stand out) into it's new home and it'll improve stability too.
What could be better than unpacking your stunning new artificial plant, positioning it in pride of place and it looking absolutely perfect? Knowing you got yourself a bargain! Check out our special offers including our famous weekly wonders.
Artificial flowers are popularly used in many DIY and crafting projects, as they do not have the same limitations as real flowers.
Faux flowers have a lot of potential when it comes to DIYs and crafts; in this blog we cover an array of different indoor and outdoor-friendly projects; from DIY napkin rings to how to build your own artificial hanging basket!
Artificial vs. real flowers for crafts
Artificial flowers
Real flowers
Appearance
✔
✔
Durability
✔ - can withstand paints, glue & markers
✖ - won't withstand being painted or glued unless the flowers are dried. Very fragile.
Sustainability
✔ - the DIY will only need to be made once.
✖ - real flowers will eventually die, meaning the DIY will need to be continuously repeated. Dried flowers may need replacing due to their fragile nature.
Creative flexibility
✔ - very versatile, does not have the requirements of real flowers.
✖ - limited. Live flowers will require a water source and sunlight to ensure they do not wilt or dry out. Dried flowers have more creative flexibility as they don’t have these requirements.
What are some good things to decorate with fake flowers?
We are all guilty of neglecting certain areas of our homes. Thankfully, this is where our colourful DIYs can step-in.
Bland and boring entrances can easily be brought back to life with some faux flowers. Go big, and create a large floral archway, or play it more minimal with a pair of vibrantDIY hanging baskets. Decorating your entrance with artificial flowers is an easy way to add some colour and curb-appeal to your home, without the pesky maintenance!
You can also use faux florals to upcycle other items in your home. If you have an old picture frame that is far past its best, why not decorate the border with faux flower heads - or alternatively, you could discard the glass, and have a wall hanging 3D bouquet!
Decorative craft ideas with artificial flowers can be truly limitless, due to the incredible versatility of fauxs - they're great at adding a pop of colour to your space too.
Fake flower crafts for kids
Get the whole family involved with these fun crafts for kids! Before we get stuck in, please note, parent supervision is advised throughout these crafts, and the following crafts are for children 8+.
How to make your own 'plant pal'
This kid-friendly DIY is great for the crafting amateurs amongst us, and can be easily done using basic supplies you're likely to already have in the house!
What you'll need:
Small to medium pre-potted plant
Paper
Scissors
Sellotape or clear tape
Pencil & eraser
Markers
Method:
Sketch a pair of eyes onto a piece of paper
Gently erase your sketch, so that you are left with a faint outline of your drawing
Using a marker pen, draw over the faint pencil outline, using it as a guide.
Once you're happy with the design of your eyes, cover them over with a strip of clear tape - this will give the eyes a glossy look, and help them last longer!
Using a pair of scissors, cut them out!
Take a piece of clear tape and roll it onto itself, so its sticky edge is on the outside. Attach this to the back side of the eye sketch - don't forget to repeat for the other eye.
Simply stick the eyes the the plant pot and voila!
Be creative! Why not create a different set of eyes for each day of the week, or change them up depending on your mood.
How to crystalise a fake flower?
Did you know you can GROW crystals on a faux!?
Borax, scientifically known as sodium tetraborate, is a common, household laundry booster that can be used to crystallise artificial or real flowers! For this scientific craft, parent supervision is needed- this craft is suitable for children 12 or more with parental supervision & guidance.
Safety:
Before starting the DIY, ensure you are working in a well ventilated space and wearing the correct protective equipment- such as a face covering, gloves,etc.
Pour boiling water into a jar or container that is large enough to hold the flower
Mix in powdered Borax until it no longer can dissolve
Place your artificial flower in the solution. You can tie a pencil to the stem of the flower if you are concerned about the flower moving in the solution or crystals sticking the flower to the container.
Leave the solution overnight to allow the crystals to grow - the longer you leave the solution, the larger the crystals will be.
Remove the flower from the container and carefully place it on a paper towel or sheet of baking paper to dry.
Once the artificial flower has dried, you can put the flower in a vase.
For this craft, you can usesaltinstead of Borax, however, the crystals may take longer to form.
Indoor crafts
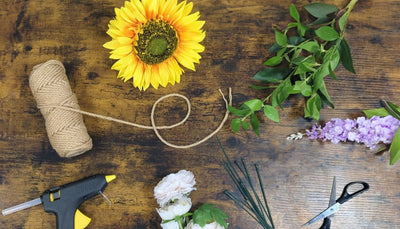
How to make your own faux floral napkin tie
Reuse or repurpose your artificial flower heads with this easy and fun craft!
What you'll need:
Hot glue or superglue (Hot glue or UHU all purpose adhesive clear glue is recommended)
Ribbon (2 meters minimum)
Artificial flower heads
How to make an artificial flower napkin tie
Measure the length of the artificial flower heads that you want to be in the centre of the napkin ring. This stage is particularly important as it will affect the length of ribbon you will need to cut. For these two sunflowers, the measurement was 18cm. To ensure your flowers are not too large and can centally on the napkin, we would recommend not exceeding 18cm.
Add 45cm to this measurement. The formula for your needed ribbon length will be your previous flower measurement + 45cm. In this example, the piece of ribbon will be cut at 63cm (18+45).
Once you have cut your piece of ribbon, tie a knot in the centre.
Now you can play about with how you want to arrange your flowers.
Once you have found a design you like, you can begin gluing your flower heads down, using the knot as a centre guide.
Once you have glued your design down, check to see if you are still happy with this design, or whether you want to add any more faux flowers.
When you're happy with the design, cut a second piece of ribbon to 60cm. If you have a ribbon style similar to the ribbon used in the example, you may wish to double the thickness and stack 2 x 60cm ribbons on top of each other. We suggest adding dots of glue to the stack of ribbon for extra security.
Glue the 60cm piece of ribbon to the backs of the original flowers. We recommend being generous with the glue to ensure the craft is durable. These two pieces of ribbon can then be tied into a bow underneath the napkin.
Voila! You're one-of-a-kind napkin holder is complete!
How do you make cheap fake flowers look expensive?
Cheap artificial flowers typically lack quality, and can look noticeably fake. Although this can be quickly disguised if you blend cheaper and more expensive fauxs together, a quick and easy way to make cheap faux stems look more expensive is to simply add your own flare to them.
Adding detail to faux stems
For this craft, you will need:
Artificial flower stem(s)
Alcohol / permanent markers
Before starting this craft, ensure your artificial stem will hold the colour of an alcohol marker, without any smudging or colour bleeding - fauxs that have a fabric-like texture are more suitable flowers for crafting . If your stem has a shiny, or plastic texture, we recommend using acrylic paints or paint markers instead. If you choose to use paint or paint markers, we suggest using a coating of Modge Podge (or other sealant) both before and after you start painting details onto your faux to make sure your design doesn't flake off.
Simply take the cap off your market pen and get to drawing! You may choose to accentuate features of the faux or change elements of it entirely. We suggest doing a mixture of both, so the stem has an overall cohesive look.
Before starting this craft, make sure you are working in a well-ventilated space, and have the correct PPE. We also advise you clean your faux plant or flower stem so the paint has an even surface - this reduces the likelihood of paint imperfections.
Using the masking tape, mask any areas you do not want to be spray painted.
Holding the spray can approximately 30cm away, begin spraying your plant. For an even coat, we recommend using 2 to 3 coats. Leave to dry between each coat.
Once your faux is dry, you can either leave it as is, or use a multipurpose paint to add details or fun patterns.
No matter the quality of your faux, there is always some tips and tricks to making your fake flowers look more expensive and real. For further styling advice, check out our guide tomaking your artificial flowers look real.
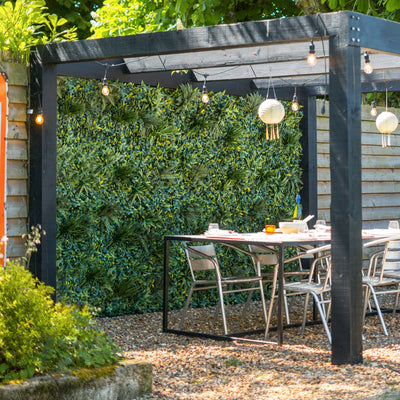
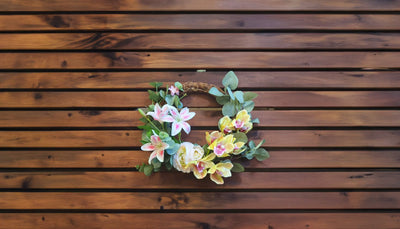
How do you decorate a wall with fake flowers?
Add some WOW-factor to your space with hanging greenery. from renter-friendly floral wall art to extravagant living wall installation, we have all the tips and tricks to help you make your home greener.
Making wall art with artificial plants
What you'll need to make artificial flower wall art
Box picture frame large enough for your stems
Flowers and/or foliage stems
Glue to hold smaller pieces in place
Pliers or wire cutters
For this craft, it is preferred to have a box frame with an internal mount board; this mount board helps cover the ends of the artificial stems, and finishes the look.
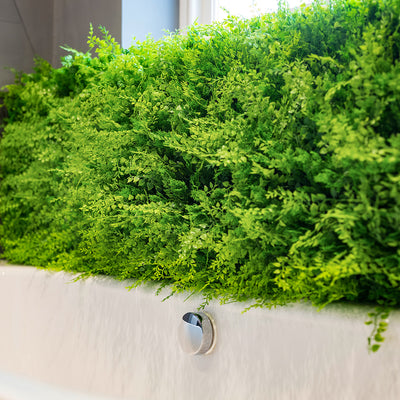
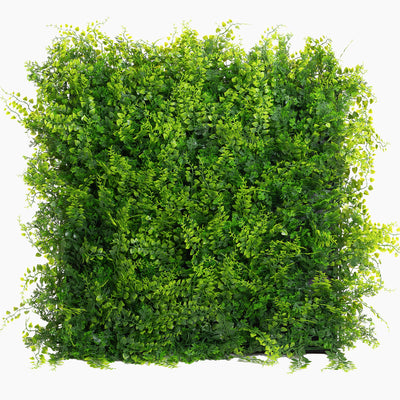
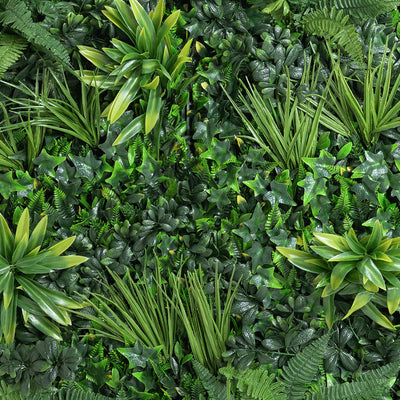
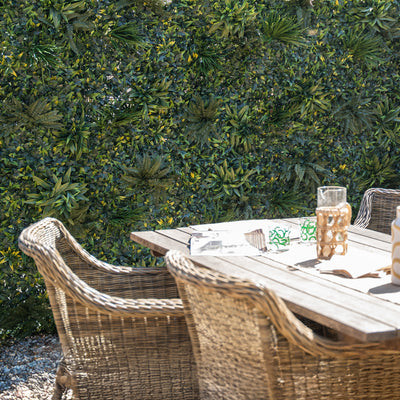
Using living walls
Our artificial living walls are the perfect solution to large, bland or unassuming spaces. With minimal hassle, you can completely transform your indoor or outdoor walls!
If you want to decorate an outdoor seating/BBQ area, we recommend checking out ourfire-rated living wall. Safety has never looked so good...and green!
Outdoor crafts
Our artificial academy is full of outdoor plant crafts, tips & tricks, to help you achieve the garden of your dreams. So, why not dive into a couple of them now!
Artificial flowers can be hardened using many methods, with some methods being particularly decorative and fascinating. Before coating the entire flower, we would advise doing a patch test - this ensures your chosen method does not affect the quality of the faux. If you plan to use your artificial flowers outside, we recommend buyingUV resistantstems or use an outdoor-use sealant to make sure they will look good year after year. As with using any sealants, ensure your space is well ventilated before starting the process.
Mod Podge:
Mod Podge is a water-based sealant, glue and finish all in one product. Mod Podge acts like a PVA glue, meaning it is easy to work with and will dry quickly and clear - making it a well respected medium within the DIY & crafting community. The other benefits of Mod Podge are that it is available in many finishes: matte, glossy, outdoor, supergloss, antique matte, pearlised and extreme glitter, meaning you can take your DIYs to the next level.
The best part is, Mod Podge is available in all shapes and sizes to suit your crafting needs! The container-version of Mod Podge is ideal for adding a coat of sealant to specific areas of your fauxs; using a small paintbrush to do so. If you're looking for a subtle stiffness or to gently seal your flowers all over in one finish, then the spray can Mod Podge will be a better suitor.
Resin:
If you're looking for a stronger sealant that will give your artificial flowers a glass-like effect, we recommend resin being your best choice.
Resin is a popular crafting medium, used to seal both living and artificial flowers in a variety of different ways, allowing them to made into items such as; pendants (and other jewelry pieces), coasters, coffee tables, paper weights, wall art and more!
Epoxy resin kits comprise of mixing parts A and B to create an air drying, clear resin. Resin is of a thick, runny consistency, which is why many resin crafts recommend using molds to ensure the resin cannot leak out. Using molds also means it is less likely for imperfections or air bubbles to form during the drying process. To ensure you can get the most out of your artificial flowers, we strongly recommend using a silicone mold for any resin-related crafts.
If you are going to seal your faux with resin, but without a mold, we suggest painting on a very thin coating of resin onto a small, upright part of the plant and leave it to dry in that same position - taking it one petal at a time, and allowing for plenty of drying time. Sealing artificial stems in this way can be difficult and time-consuming, so before going all in, we strongly suggest painting one petal to see if this method is for you.
Borax Crystallisation:
Did you know you can GROW crystals on a faux!?
Borax, scientifically known as sodium tetraborate, is a common, household laundry booster. Borax can be used as a method to harden your artificial flowers. As the crystals form, a hardened layer is created around flower, giving the faux a 'frosted' or 'icy' look.
How to crystallise a fake flower?
Pour boiling water into a jar or container that is large enough to hold the flower
Mix in powdered Borax until it no longer can dissolve
Place your artificial flower in the solution. You can tie a pencil to the stem of the flower if you are concerned about the flower moving in the solution or crystals sticking the flower to the container.
Leave the solution overnight to allow the crystals to grow - the longer you leave the solution, the larger the crystals will be.
Remove the flower from the container and carefully place it on a paper towel or sheet of baking paper to dry.
Once the artificial flower has dried, you can put the flower in a vase.
For this craft, you can use salt instead of Borax, however, the crystals may take longer to form.
If your paint states that it’s suitable for outdoor use, then it likely contains UV blockers to protect your plant from fading in the sunlight, however, it’s best to consult the paint manufacturer.
Note that even though your paint may prevent your artificial plant from fading in the sunlight, it won’t protect more delicate plants designed for indoor use from being damaged by the wind or extreme weather.
What can I spray on fake flowers to stop them from fading?
There’s nothing worse than faux flowers that have faded in the sun. Sadly, due to their intricate detailing, it’s virtually impossible to create UV-stable artificial flowers.
That said, we don’t recommend using any UV protection sprays on your faux flowers. These acrylic sprays usually contain an absorbing chemical which may extend the lifespan of your flowers, but their effectiveness is debatable depending on the coverage. They can also leave a sticky finish, turning your flowers into a dust magnet!
Instead, try to keep your flowers out of direct sunlight if possible. If you’re planning to use them in a sunny windowsill, stick to pale colours and rotate your flowers so that any fading is distributed evenly.
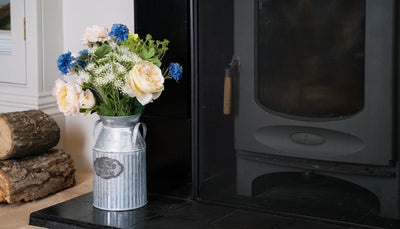
Wanting to switch things up from your classic vase? Here are some of our upcycling vase options.
Wine bottles, pitchers or kitchen glassware
Repurposing old glassware, like wine bottles or old pitchers, can be a minimalistic, eco-friendly option for displaying your faux florals. This vase alternative can look particularly stylish and effortless in kitchen and dining spaces.
Teapots or tea tins
Reusing old or second hand teapots as vases can be a quaint alternative to a traditional vase. These can style nicely on coffee tables and small side tables - depending on the size of your teapot. Don't throw out your empty tea tins! You can repurpose your old tea tin into a faux planter too. These small but beautiful vase alternatives are perfect for adding a pop of interest to a kitchen shelf or worktop.
Tin can
Wanting something more rustic or industrial? Why not try repurposing an old, empty can! As cans may have rough inner edge, we recommend filing the inner lip of the can before washing it out to blunt the sharp edge to prevent injury. If the plain tin can vase isn't for you, why don't you try decorating it. Tin cans are incredibly versatile and can be decorated (and covered) in many ways, from painting to wrapping in string or twine. Whatever, your style, there is sure to be a decorative can craft for you.
Watering can or bucket
Indoor outdoor living is becoming increasingly popular and trendy... Bring some of those outdoor elements inside by repurposing a watering can or tin bucket. These fun farmhouse vase alternatives can easily style up any shelf or side table or why not make a statement, and go for a large tin bucket to be the centrepiece of your dining table!
Pumpkins, watermelons or other large fruit & veg
Feeling seasonal? Why not try this decompostable vase alternative. Simply cut a hole in the top of your fruit or vegetable of choice and stand your faux bouquet inside. If your artificial flowers have flocked or material stems, you may wish to stand them into a vase or other vessel first and cut a hole in your chosen fruit or veg to fit the size of it. Show your spooky side with a pumpkin vase, or say hello to summer with a watermelon vase. Remember: this is a great no waste option if you have already hollowed out a fruit or vegetable to bake with!
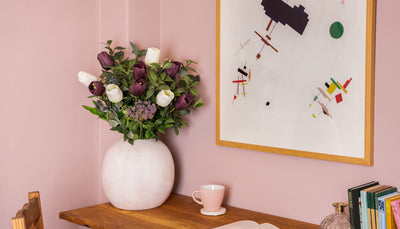
What do you put in the bottom of the vase?
Usually all you need to accompany a bouquet is a vase and some water to keep them going. Things are a little different with artificial bouquets...
We choose our flowers based on their realism and to do this most include an internal wire so that you can bend it into a natural position. The only downside is that the wire can rust when exposed to water. Here are some alternative options:
Leave your vase empty. There’s nothing wrong with leaving your vase empty and just sitting your bouquet inside on its own.
Use beads to hide the fact that there’s no water and mask the stems.
Secure the stems permanently with resin. It's a gel that looks just like water and holds the flowers neatly in place. Be careful as resin is permanent so you'll be sacrificing your vase. Also make sure you pick a resin with UV stabilisers to stop it turning yellow in the sun.
Need more help with faux flower crafts?
No matter the quality of your faux, there is always some tips and tricks to making your fake flowers look more expensive and real. For further styling advice, check out our guide to making your artificial flowers look real.


 Credit: