Create your very own green zen space, hanging plant utopia or exotic bathroom spa with our lifelike artificial plants. Have fun creating instant updates and placing greenery wherever you want it without any of the hassles of caring for real plants.
Whether you want to create a jungle outdoors or indoors, our wide range of artificial trees has been crafted to perfectly mimic nature – even up-close.
Screening doesn't have to be dull. Shop our range of artificial plant screening options to beautify your fencing, add privacy to intimate areas of your garden or mask unsightly spots.
Finishing touches like pots and planters will make a huge difference to your artificial plants, trees, and flowers. A pot will help the plant blend (or stand out) into it's new home and it'll improve stability too.
What could be better than unpacking your stunning new artificial plant, positioning it in pride of place and it looking absolutely perfect? Knowing you got yourself a bargain! Check out our special offers including our famous weekly wonders.
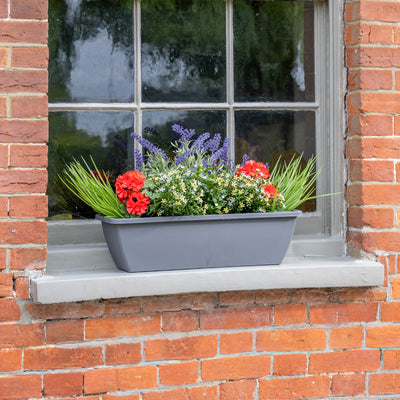
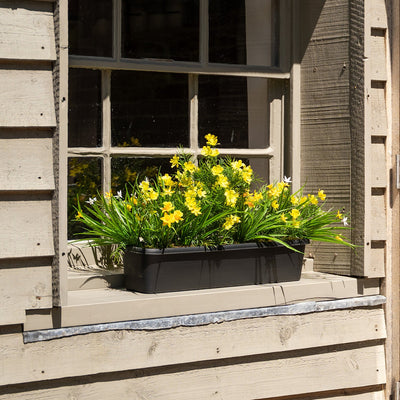
Fancy having a go at making your own unique artificial window box? You've come to just the right place!
We’re not big on constant watering, pruning and the rest, so we’ve put together a quick video (with the help of our lovely customer service advisor Rachel 🥰) to show you how to make an artificial window box using faux flowers.
You might want to get stuck in with adding your flowers and foliage to your window box straight away, but there are a couple of steps you need to take first.
You can use any sized window box you like as long as it’s designed to be used outdoors if that’s where it'll be living. The one we used in the video above is 60cm (W) x 13cm (H) 16.5cm (D).
Once you’ve chosen your trough, take an empty bag and add enough stones or sand to keep your window box weighed down, then pop the bag in the bottom of your planter.
2. Use oasis foam
Oasis foam is perfect for keeping your flowers secure as it’s super easy to use and it won’t retain any water.
You might need a few blocks depending on the size of your planter, but it’s best to measure up your trough first to check this.
Once you’ve got your oasis to hand, all you need to do is push it into your trough so it’s tightly packed and not moving around inside.
If you think your trough needs some extra weight, you can always add a layer of stones or soil on top, which will also help to hide the oasis out of sight!
3. Add flowers to your window box
Now for the fun part!
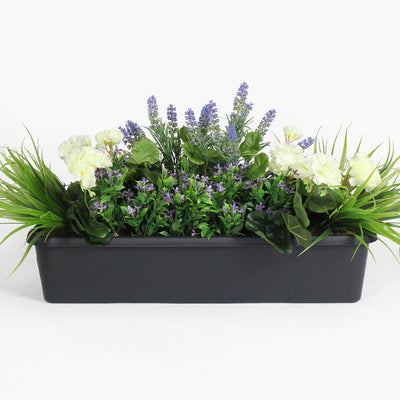
Go wild and add your flowers and foliage to your window box by poking the stems into your oasis. We use a 60cm (L) x 16.5cm (D) x 13cm (H) trough, which usually fits around 6-10 flowering bushes. You can check the size of our flowering bushes in the details box on each product page to get an idea of how many you'll need.
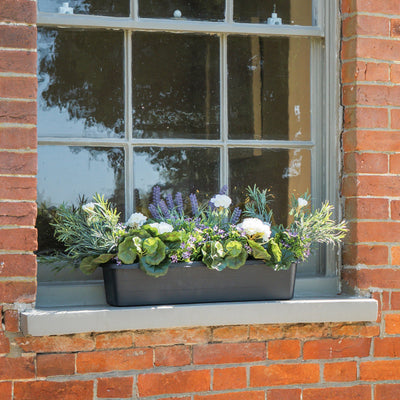
There are no rules for this, but we find that the most popular window boxes tend to have a taller centrepiece surrounded by flowers, with foliage on either side like our mixed flower window box. If you’re going to be sitting your window box on a balcony or railings, it’s often nice to have some trailing foliage in there to cascade down, which our ivy bush and fern hanging bush are perfect for!
As we said though, you can decorate it however you like, we won’t try to stop you. 😉
4. Finishing touches
By now, you should have a gorgeous-looking window box ready to go into its home. Just make any final adjustments by moving the foliage around and fluffing out the leaves until you’re happy, and if in doubt, you’re more than welcome to ask us any questions.
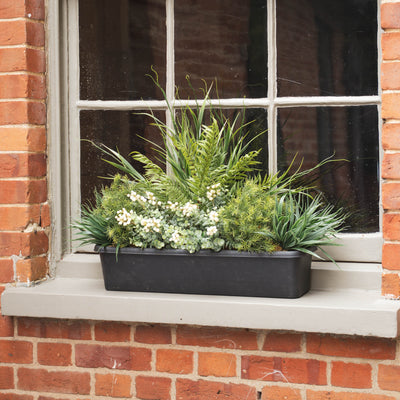
Summer window box ideas
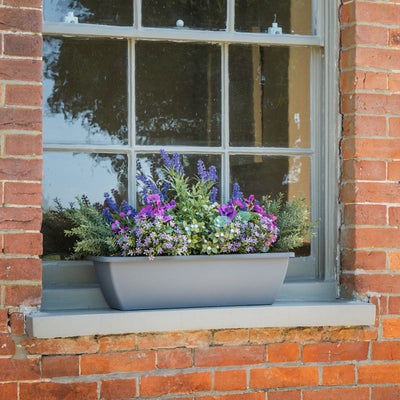
In the warmer months, we love to see bright and bold colours overflowing out of window boxes, just like our colour burst window box and English garden window box. Try using large geranium bushes, hydrangeas or lavender with some vanilla grass to achieve a summery vibe.
Winter window box ideas
When it’s colder, vibrant flowers will be out of season and might earn you some funny looks from your neighbours. Instead, switch to more subtle shades of green and white, like our forest foliage window box, by using our mini cedar pine in the centre, small fern plants, vanilla grass and pansy bushes. This way, you’ll still pull off the illusion of looking more real than faux. 🧙
Commonly asked questions
How long will my outdoor flower arrangement last?
Putting a lifespan on any outdoor artificial plant is really tricky, and these outdoor arrangements are probably the hardest because the foliage is delicate and less able to withstand the elements.
In our experience, the answer is between one and three years. If your arrangement doesn’t last at least a year, get in touch.
Determining the lifespan comes down to a whole host of factors such as location, amount of sun it’s exposed to, humidity, and more. For more info, see our guide to UV resistance.
Can I use it outside all year round?
You certainly can, except for in extreme weather where you’d be best to move your arrangement indoors or to a more sheltered spot.
Aside from that, the oasis foam won’t retain any water and our range of flowers and foliage are designed to be used outdoors all year round.
How do I mount my window box to a wall or balcony?
You can find brackets for window boxes online which will grant you the ability to fix your window box to your wall or balcony. Just make sure to check that the bracket is compatible with the size of your window box. Unfortunately we don't have any available on our website at the moment.
Can I use wooden trough?
You can use any trough you like to create your window box! If you're using a wooden trough, we'd first recommend treating it with a preservative to keep it in good condition and upkeeping this annually.
Can I use soil instead of oasis foam?
You can definitely use soil rather than foam if you would prefer, but it's not likely to hold your bushes as securely as oasis would. If you'd still like to use soil, just drill a couple of drainage holes in the bottom of your trough to let any rain water drain.
Should I add drainage holes?
It's not the end of the world if your planter doesn't have any drainage holes, but if you can, it's best to drill a couple of holes in the bottom to allow any built-up rainwater to drain away. Even better, try to source a planter with pre-drilled drainage holes.
Be careful if you're drilling into ceramic or terracotta pots, as there's a higher chance of them cracking!